


Document Actions
gvSIG-Desktop 1.10. User Manual
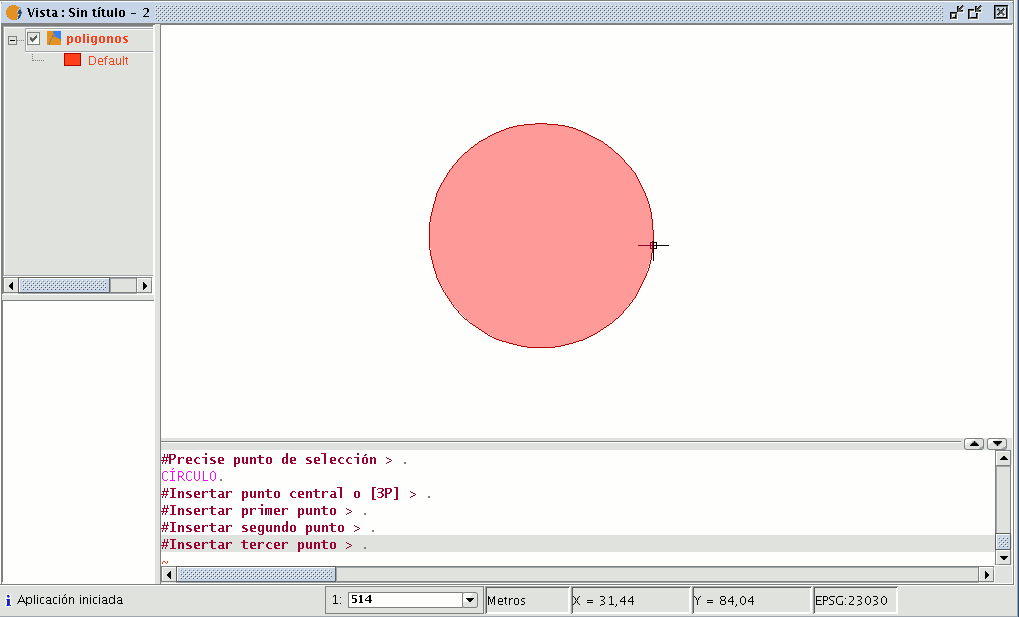
This command draws a circle inside the graphic area. You can select this tool by clicking on the “Circle” button in the tool bar

or by going to the “Geometry” menu bar then to “Insert” and “Circle”, as shown in the figure below.

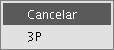
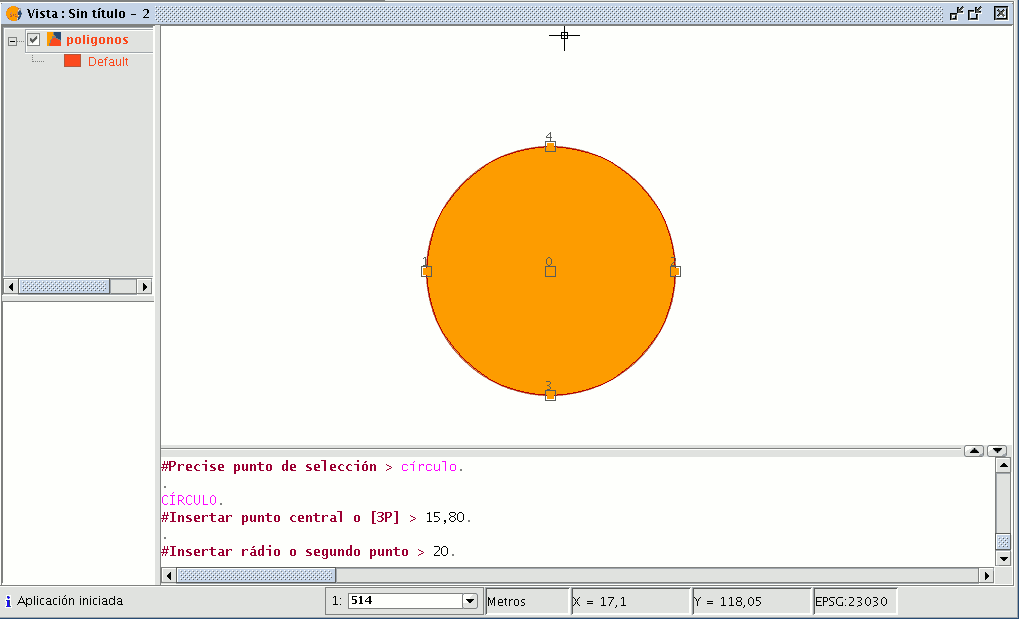
There are two ways of defining a circle. The first option is to define the central point and the radius. Select the “Circle” tool and click on the graphic area in the place you wish to locate the centre of the circle you are drawing. Then move the mouse to increase the radius of the circle until it reaches the required size. gvSIG will, as always, create a projection of the circle as a reference point to show the position of the circle in the drawing. The second way of drawing a circle in gvSIG is to define it by using three points. To access this option to define a circle, first select the tool and then go to the contextual menu by right clicking on the mouse in the graphic area.
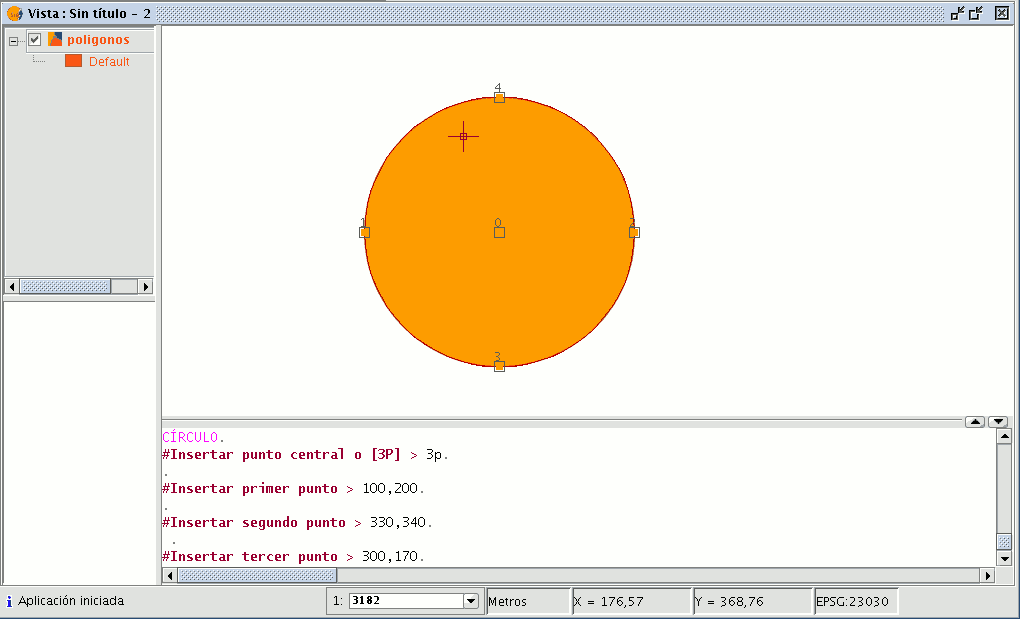
There is only one circle that goes through three given points. When you use this option an elastic circle appears. It is defined by these two points and the cursor until we define the third point, as shown in the figure below.
You can also draw a circle from the command console using any of the methods described above for graphic drawing. Write the command “circle” in the command console and press “Enter”. Insert the coordinates of the central point and then the coordinates of the point that will mark the desired radius or length (use the status bar to check whether you are working in metres or another measuring unit).
To insert a circle from the command console by defining three points, write “3p” when the “circle” command has been activated. When you use this option an elastic circle appears. It is defined by these two points and the cursor until we define the third point, as with the case of the graphic drawing of the circle. The figure below shows how to create a three-point circle.
Cached time 11/21/13 07:09:20 


